Hi, stitching friends!
Several of you have asked about how I do the lacing when I frame cross-stitch. I've been promising Mary (of
Stitching Friends Forever) a tutorial, so here goes.
All the photos in this tutorial are clickable in case you need a closer look.
Did you know?
Not many professional framers lace needlework these days. It can be time consuming, and when they're running a busy shop, it's often not cost effective. If you know how to lace your own needlework, you can:
- Save money by framing things yourself.
- Appreciate what goes into lacing so you know why your framer charges a lot to do it (IF they do it).
- Lace things yourself if your framer refuses to do it.
Scary, scary
Some professional framers use staples and/or glue instead of lacing. If this makes you shudder (like it makes me shudder), read on.
Supplies
- Acid-free foam core (1/4" or 3/16" thick)
- Ruler
- Cutting tool (X-acto knife or box cutter)
- Cutting mat
- Straight pins, preferably with an easy-to-grab head
- 1/2" sequin pins
- Cotton thread (heavy-duty mercerized cotton thread or fine crochet thread)
- Needle
- Scissors
- Optional, but nice to have: light table
Step 1: Cut acid-free foam core to the size of the inside of your frame. Be careful. Measure twice and cut once. It's better if the foam core is cut just slightly smaller than the size you need, but not bigger than the size you need or it won't fit in the frame.
Step 2: Center the needlework on the foam core. I have an LED light table that comes in super handy for this step ($15-$20 on Amazon), but if you don't have one, use a window to help you center your stitching on the foam core.
Center your stitching on the foam core. Take your time.
Step 3: Pin the needlework to the foam core. Starting in a corner, insert two ball-head straight pins into the foam core.
Next, move to the centers out from the corners and insert ball-head straight pins into the foam core to hold the needlework in place.
Continue all the way around on the corners and centers, being careful to keep your needlework centered on the foam core. Make adjustments as necessary. Take your time. This step is important!
Next, insert 1/2" sequin pins between each of the ball-head straight pins, spacing them about 1/4" apart.
Continue until you've gone all the way around.
Next, remove the ball-head straight pins and replace them with 1/2" sequin pins. You want those bulky ball-heads out of your way when you start lacing, or you will curse a lot.
Step 4: Get ready to lace! I've heard people suggest using dental floss for lacing needlework, but I strongly caution against it. Chances are, you've stitched your piece on linen or another natural fiber fabric. Dental floss is made of a synthetic fiber, such as nylon, which is stronger than your natural fiber. If you use dental floss or polyester or nylon thread for lacing, you're risking tearing or weakening your linen fabric over time.
Use cotton thread. Mercerized heavy-duty cotton thread or a lightweight cotton crochet thread would be good. I pick up old spools of cotton thread when I'm thrift-store shopping, such as the one in the photo above. The color doesn't matter because it will be in the back and no one will see it.
Edit (9/6/2019): Robin in Virginia pointed out that it's best to choose white, off-white or cream-colored thread in case your needlework is exposed to dampness. You wouldn't want colored thread (which may not be colorfast) to run and ruin your needlework. I wholeheartedly agree!
Put that spool of thread on a spindle. Some people use a nail, but I found that if I stick a chopstick into my desk junk organizer thingy, it works great.
Step 5: Let's lace! Thread a sharp needle and insert it into the back of your now-pinned needlework, about 1/2" from the edge of the fabric and lined up with one corner of the foam core. See photo above for reference.
Go back and forth, inserting the needle about 1/2" from the edge of the fabric and spacing your laces 1/2" to 3/4" apart. Just go back and forth, back and forth, pulling extra thread as you need it. It will be loose and sloppy. No worries. I hope you have good music going on in the background. For me, it's Aretha Franklin, Ray Charles and old R&B. That's my happy music.
Continue lacing back and forth, back and forth, until you get to the other end. Stop at the end of the foam core, not at the end of the fabric. See photo above.
Now, pull your needle off the thread, and tie a knot in the end of the thread. The other end of the thread is still attached to the spool on the spindle.
At the knotted end of the thread, start pulling your laces tight, like you're lacing up a shoe or a corset. (Heaven forbid any of you wear a corset, but you get the point!)
Keep going, pulling the thread tight until you get to the end. Stitch the thread down tight and snip it.
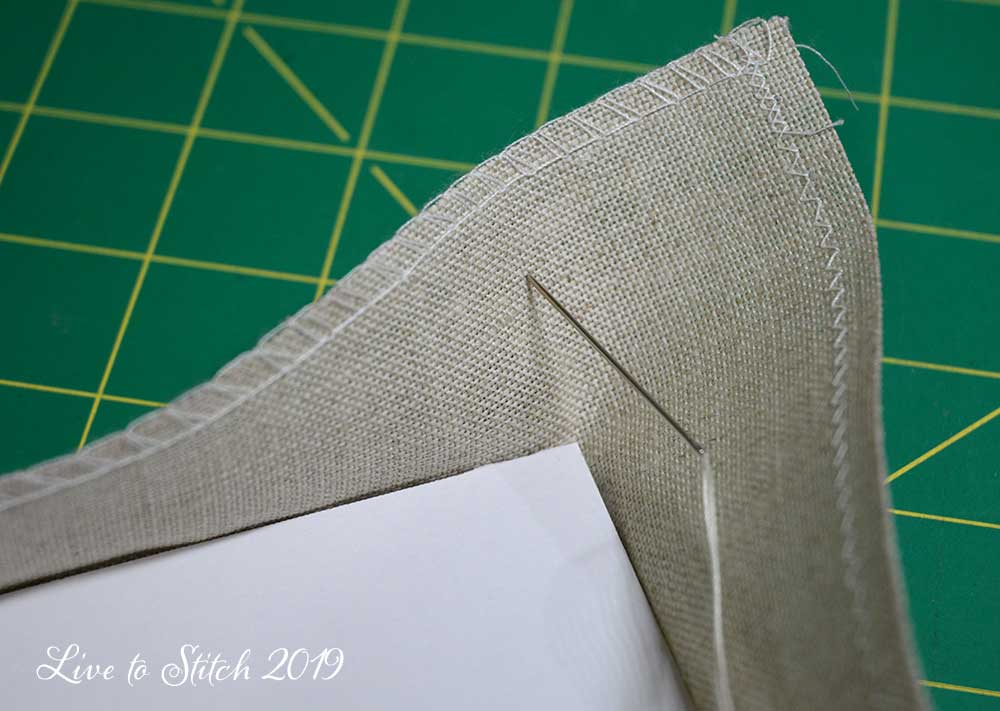
Step 6: Tack down the corners. Using your fingers, square up one corner and finger press the fabric, forming a nice square corner.
Thread your needle with a shorter length of thread, about 12" long. Tie a knot in the end. Poke the needle into the corner as shown above and pull it through, pushing the knot into the fold so it's hidden.
Whip stitch the corner down and tie it off when you get to the end.
Repeat for all the corners.
Step 7: Repeat the lacing in the other direction. Refer to step 5.
Step 8: Remove all the 1/2" sequin pins. You may be tempted to leave them in as a security blanket, but trust yourself. You did fine. You don't want those pins to rust if you're ever in a high-humidity environment. And you can use them again next time you lace something.
Step 9: Put your laced piece into your frame. If you don't plan to change out the stitched pieces in the future, you can cover that ugly back with some decorative paper cut flush with the edge of the frame.
Voilah! All done!
I hope you found this tutorial helpful. If you have ANY questions, please ask. I love questions!
Have a wonderful day, friends, and I hope you try lacing if you haven't already.